
A cart of panels leaves the saw: the same material, pieces that look alike. If the edgebander, the boring station and assembly have to guess from the size which piece is the left side and which is a shelf, sooner or later the wrong edge gets banded or a part gets cut again. A part label prevents that. But what goes on it, what stays on the cut sheet, and where and when the label goes on are separate decisions. This article takes them one at a time.
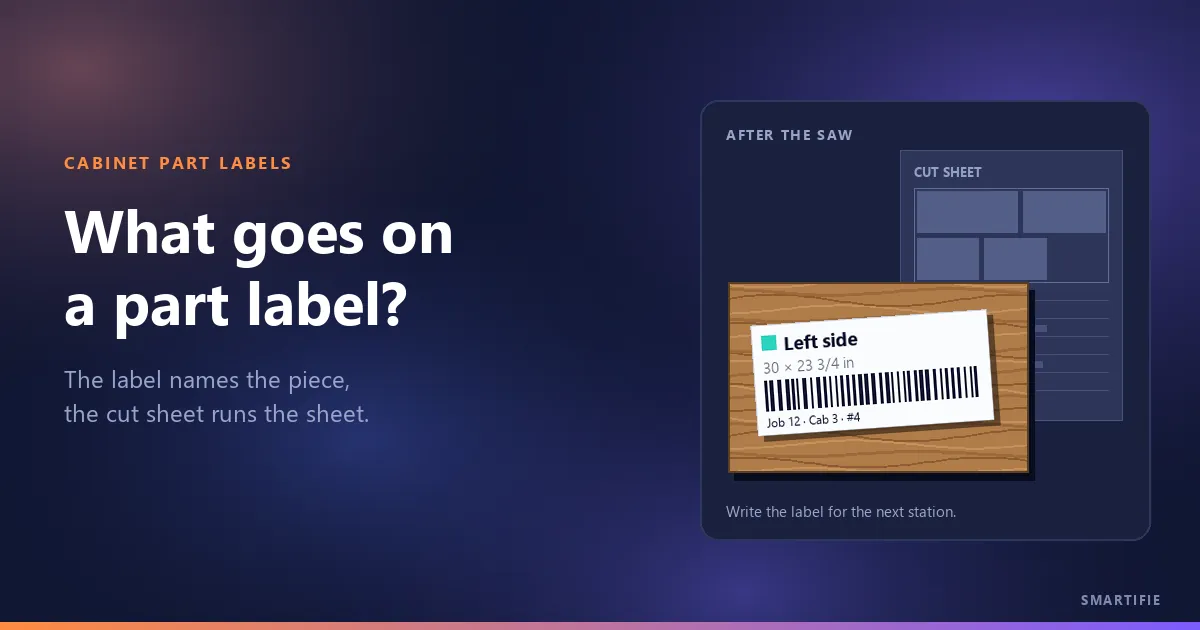
The short answer: a part label is written for the stations after the saw, so it carries what identifies the piece and what happens to it next: the job or order, the part name, the size, the edge banding and grain, and a unique ID. The sheet drawing, the part's position, the waste and the kerf belong on the cut sheet. The label goes on a hidden face, as soon as the piece comes off the saw, in sheet order.
Who is a part label written for?
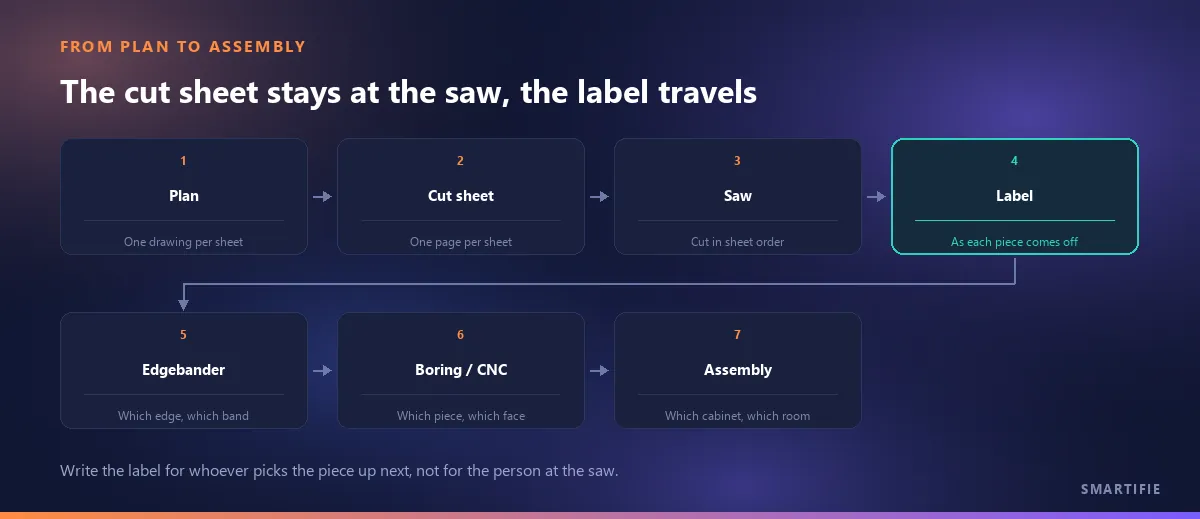
Whoever runs the saw already knows the piece from the cut sheet; the person who really needs the label is the one who picks the piece up next. The edgebander looks for which edges get banding. The operator at the boring station or the CNC looks for what the part is and which face goes up. Assembly wants to know which cabinet it belongs to, and packing which job it ships with. Every station reads the same label with its own question.
On a CNC maker's user forum, one practitioner says he'd like to see the cabinet number on the printout instead of generic “1, 2, 3” numbers, and that for now he writes those numbers on by hand; he also likes seeing the edges to band and the band type on the label (Thermwood forum, 2011). What he asks for isn't for the saw; it's for the stations after it. The rule: write the label for the next person, not for the person at the saw.
This article is about the part label that stays inside the shop; the carton label for shipping is covered in a separate article.
What to put on part labels: five fields at minimum
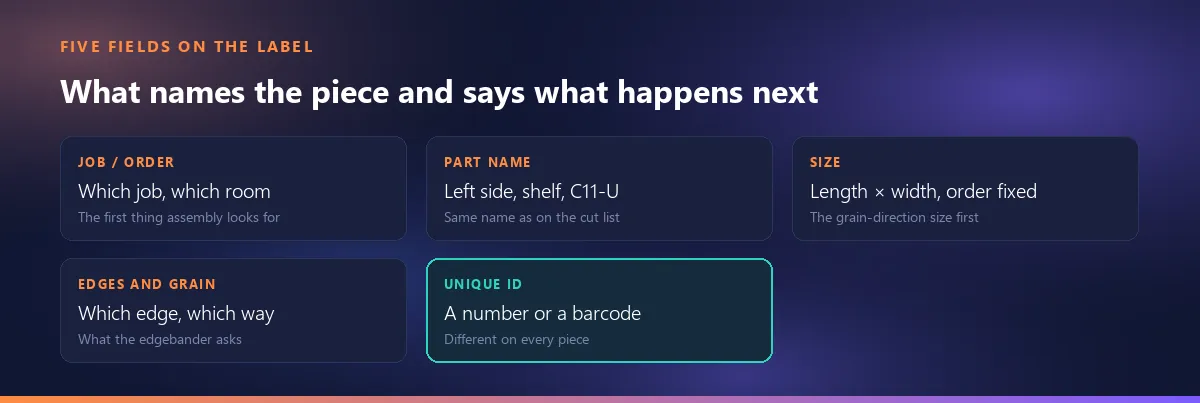
Whatever the label's size, five fields answer the questions of the stations that follow:
- Job, order or room: which job, which kitchen or room does the piece belong to? When several jobs share the same sheets, it is the first thing assembly looks for.
- Part name or code: “left side”, “shelf” or “C11-U”, the same as on the cut list. A bare number tells nobody anything without the list.
- Size: written so that it's clear which value is the length and which the width. Settle the order once in your shop (the size along the grain first, for example) and use it on every label.
- What happens next: which edges get banding, the band's colour and thickness, the grain direction. That is what the edgebander and the boring station ask; how to show it is below.
- Unique ID: a number or barcode that differs on every piece. Two shelves of the same size carry the same name; this number is what tells them apart.
Practitioners' lists grow around this core. Tech Forward Cabinetmaker, a newsletter for cabinet shops, lists the job name, room, part name, edges to band, band type (colour, thickness), finish colour and custom part notes on the label of a part coming off the CNC. If more than one material rides on the same cart, add the material code and thickness too; on a day with a single material, that field only takes up space.
What goes on the cut sheet, not on the label
The cut list or cut sheet is the paper at the saw that describes the sheet. Some information is only useful at the moment of cutting and doesn't need to travel with the piece: the sheet drawing, the part's position on the sheet, how many sheets are cut from the same drawing (×repeat), the kerf, that sheet's waste and the reusable offcuts left after cutting. Put those on the label and it gets bigger and harder to read, and none of the stations after the saw is looking for them.
The line doesn't fall in the same place in every shop. Another practitioner on the same CNC forum (Thermwood forum, 2008) writes that in his setup the label prints the cabinet name, the cabinet part and the edge to band, while the part size is printed on the nest sheet, not on the label. Putting the size on the label too is a choice that depends on your stations; if the edgebander and assembly check by size, include it. The rule: the label is the piece's identity, the cut sheet is the sheet's instructions, and the same number ties the two together. If the part number on the cut sheet is also on the label, a piece whose label has come off can be found on the sheet.
The cut sheet itself is read at the saw; reading the cutting diagram at the saw is a separate article. The offcut left from cutting gets a tag too, but that tag says something else: what goes on an offcut's tag is in our article on offcut inventory.
How to show edge banding and grain on the label
The quickest way to show which edges get banding is a small rectangle drawing: the part's outline, with the banded edges drawn thick. The edgebander doesn't have to read anything; he turns the piece the same way as the drawing and feeds the thick edges. Without a drawing, text works too: give the edges a code (the long edges L1/L2 and the short ones W1/W2, for example, or “front/back”) and add the band's colour and thickness. Whichever you choose, everyone in the shop has to call the same edge by the same name, or which edge L1 is gets argued again every shift.
Show the grain with an arrow, and say which size runs along the grain: “30 ↕”, or underline the grain-direction value in the size. If you always stick the label on the same way (its long edge parallel to the grain, say), the label itself becomes an arrow. Which parts must follow the grain is a separate decision, made before cutting.
Do part labels need a barcode, and what should it carry?
A barcode only adds value if something reads it: a spreadsheet that sorts pieces by order, a count, or a second machine that calls up work by barcode. Some shops use the barcode to call up the program on a second machine. If nothing reads it, the bars just take up space; a readable number does the same job.
What a barcode should carry is not data but a unique ID: something like the job, the sheet, which copy of that sheet and the part number, a value that differs on every piece. The part name and size are already on the label in readable text; trying to fit them into the barcode makes it longer and gains nothing. A code that stays inside the shop doesn't need a GS1 number; whether an in-house code needs a GS1 number is covered in a separate article. Code 128 is a common choice for in-house codes that mix letters and digits; how the barcode types differ is on the page of our free barcode tool. Print the same code as text next to the barcode: when the scanner fails or the label gets scratched, a person reads the ID.
Where and when to put labels on cabinet parts
When: as soon as the piece comes off the saw, while the sheet is still on the table. Labeling later, from the stack on the cart, is the shortest way to swap two pieces of the same size: if two shelves match, which one goes to which job is now a guess. That is why it matters that labels print in sheet order; when a sheet is cut, its labels are next in the stack. Tech Forward Cabinetmaker also describes printing the label as the part comes off the CNC.
Where: a hidden face, or a face that closes up in assembly. A visible face, or one that will be painted or finished, can keep a mark from the label. That is why the practitioner tips collected on WOODWEB describe other routes: masking tape and a pencil instead of a label, the label stuck inside the cup hole bored for the door hardware, or the number stamped in UV ink. If you do label a surface that will be finished, choose a removable adhesive that leaves no residue.
Before edgebanding: the label must not run over an edge that gets banding. A label hanging over the edge either gets scraped off in the edgebander or ends up under the band; stick it a finger's width in from the edge.
Roll label printer or a sheet of labels?
There are two routes. A roll label printer prints each label as the piece comes off and keeps the order by itself. The printer type matters here: direct thermal labels darken over time with heat and light and can become unreadable, while thermal transfer, which prints with a ribbon, lasts longer (Zebra FAQ). If the label has to stay on the piece through assembly or all the way to the customer, that difference matters.
A sheet of labels, or plain paper and scissors, is enough with an office printer when the numbers are small. The price is keeping the order: the sheets have to reach the saw in sheet order, and a sheet's labels have to be used while that sheet is being cut. As for size, the label has to be big enough for the barcode to scan and, if you want one, for an edge drawing to fit. Tech Forward Cabinetmaker recommends at least 2 in of height so the part graphic shows; a small label without a drawing (about 62 × 29 mm, roughly 2.4 × 1.1 in) carries the name, the size and the code. Columns, rows and millimetres on an A4 sheet are explained on our barcode tool's page.
In a cutting planner: the cut sheet and part labels from the plan
If the cut sheet and labels come out of a program, the decisions above stay the same; what changes is which of them you still write by hand. You can watch it step by step in our own planner in the video below. The company, materials, sizes and figures in it are fictional example data for a sample shop; the figures are that example's result, not a promise.
Watch how it works
Real screens, start to finish.

Cut List Optimizer: Print Cut Sheets and Part Labels | Smartifie Cut
How to print the cut ticket for the saw and a barcode label for every piece in Smartifie Cut: one page per sheet layout with the parts table and a PDF, then one Code 128 label per piece with the plan, layout, copy and piece number.
The video loads from YouTube when you press play.
In Smartifie Cut, a cutting planner that prints the cut sheet and part labels from the plan, both open from the “Outputs” strip on a saved plan's page. The Cut ticket, the cut sheet for the saw, is one page per sheet layout: at the top the ×repeat (how many sheets to cut from this drawing), the stock code, the sheet size, the kerf and that sheet's waste; below it the same drawing as on the plan and the parts table (#, label, size, position and ↻ for a rotated piece); at the bottom the sizes of the reusable offcuts the sheet leaves. The # in the table is the piece's number on that sheet, not the cutting order; the same number ends the piece's label. The ticket prints from the browser or downloads as a PDF; the PDF opens with a summary of pieces placed, stock used, waste, kerf and the plan's status, a rotated piece reads “90°”, and every page ends with “Cutting plan — not a delivery note, not an invoice”. The Windows and Android apps have no Print button; the PDF opens in your viewer. When parts come from customer orders, the ticket also carries a list of pieces by order.
Labels come one per piece: if a drawing is cut three times, every copy's pieces get their own labels (“copy 1 of 3”), and the labels come out in sheet order. A label carries a colour square matching the drawing and the part's title, the size and unit, the order number and customer for a piece taken from a customer order, the plan number · layout · copy · piece number, and a Code 128 barcode carrying that value (KP-2026-00027-1-1-3, for example), so no two pieces share a code. The title is the part's label, code or name; if it has none, it is the job's line number (“#1”). If a part was entered on the job screen with a description only, the description isn't printed and the title shows that line number; import parts from Excel with a part code or name and that is what the title shows. The labels PDF lays out 62 × 29 mm framed labels, two across, on an A4 page, which you print on adhesive or plain paper and cut out. The label's size and fields are fixed; there is no template, size or barcode type to choose. The app itself has no scan screen either: the barcode is an ID for your own scanner or spreadsheet.
And what the program doesn't put on the label, which we'd rather say plainly: our label has no edge banding drawing, no grain arrow, no material and no job number. Edge banding and grain direction are in the job's parts list and on the drawing of the cut ticket you open in the browser; the PDF ticket's drawing doesn't show them, and the PDF only gives the plan's edge band total. The label has the plan number, which tells you which plan a label belongs to once it's away from the ticket. We've kept the label short for now. If you want banding and grain from the five fields above on the label, today you add them with a pencil or a separate label. The screens are described in the guide's sections on the cut ticket and labels.
A six-point checklist for part labels:
- Who will read the label? List the stations after the saw.
- Five fields: job or order, part name, size, edges and grain, unique ID.
- Drawing, position, ×repeat, kerf, waste and offcuts stay on the cut sheet; the same number ties the two.
- For banding, a small drawing with thick edges or an edge code everyone names the same way; for grain, an arrow.
- Stick it on as the piece comes off the saw, in sheet order, on a hidden face and in from the edge.
- Choose the printer route: a thermal transfer roll when it has to last, an A4 sheet handed out in order for small numbers.
In short: the label is the piece's identity and is written for the next person; the sheet's instructions stay on the cut sheet. Write the five fields, tie them to the cut sheet with the same number, and put the label on as soon as the piece comes off the saw.
If you want to print the cut sheet and part labels for your own jobs from the plan, you can try Smartifie Cut free for 15 days, no credit card required. It runs as an app on Windows and Android, and in the browser on iPhone and Mac.